
Ok, I love this skirt. It made me smile every time I passed it by this afternoon. I've been playing around with the idea of this for a few days.

Generally my ideas start from random sketches, like this. I pick and choose what I like and modify it until I have a final project. (rarely does the original sketch look like the final product...each project takes it's own twists and turns)

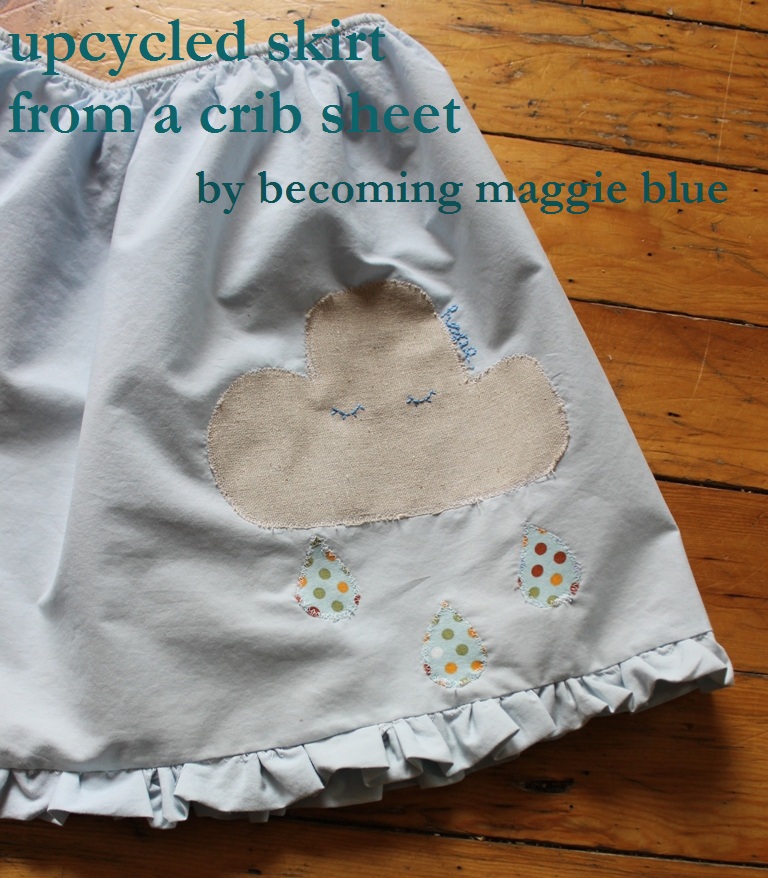
I liked the idea of the cloud on the skirt, but I wanted a pretty blue fabric for the sky. I knew the exact shade, but I didn't have any fabric like that. So I began to go through old clothes for inspiration...suddenly I realized that the old blue crib sheet in the closet was the perfect color. Since I'm not having any more babies, and since it's faded after years of drooling and leaking diapers and washing, I didn't mind using it. Plus because of all the washings it's also a very soft, well worn fabric. Perfect. Upon first cut I figured I'd just use the fabric, till I realized that the elastic on mine wasn't in a casing, it was sewn directly to the fabric...I could use the elastic as-is and save myself some work and materials. (don't worry if yours IS in a casing, if you want to use it as-is you'll just need to stitch it in place before you cut so that it won't slip out)

First I took out the scissors and cut through the elastic at the corners, I also cut the seam at the corners so the fabric would lay more flat. Then I fitted the elastic around my daughter and cut the skirt width and length roughly to measure. (really roughly, this is a forgiving project) My daughter is a size 6, the elastic on the long side of the sheet fit perfectly with no additional trimming.


At the same time I cut the strips of fabric for the ruffle, since there is limited fabric on a crib sheet I cut the two strips out from below the skirt and pieced them together (like a quilt binding) to have enough fabric to ruffle around the whole skirt.


If you use the elastic on one whole side the sheet will have been folded in half, leaving only one seam to sew. So I sewed up the seam from top (elastic) to bottom first. Next I added the ruffle. Everyone has their own way they like to ruffle, I doubled the fabric over and used the folded edge for the ruffle bottom. Next I did a big zigzag stitch along the rough-edge side and ran a thread along the length of the whole strip. Then I pulled the string to ruffle it, pinned it on and sewed it in place.

Typically I would do the applique before I sew the piece together, but in this case I wanted to see the applique on the finished project to decide the placement. I freehand cut the cloud and raindrops and placed them on one at a time, zigzagging around each piece before putting the next one. With that done I hand embroidered the eyes and the word "hope." (If you've never done this part before, don't be afraid, just give it a try...it's super easy)

I have a few more sheets left, which is good because once you see the possibilities it's hard to resist...I've got a peasant top and harem pants lined up for the next two sheets.


No comments:
Post a Comment